8 Exercises to Build Better Hiking Posture and Ease Back Pain
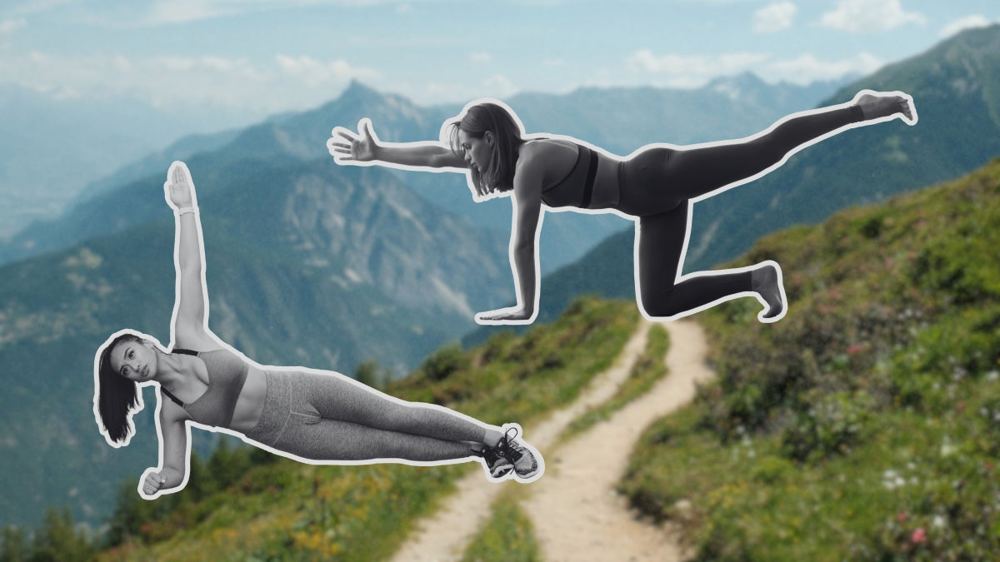
If you get back pain on the trail, start doing these eight exercises to improve your posture and ease aches. The post 8 Exercises to Build Better Hiking Posture and Ease Back Pain appeared first on Outside Online .
Think of your posture like the alignment on your car: over short distances or the short term, a little tilt is no problem. But when your biomechanical odometer starts to tick up, wear and tear shows up in all the wrong places.
Unaddressed, bad posture under heavy loads can lead to chronic injury , or at least enough discomfort to sap the joy out of hiking. “You can get neck pain, back pain, thoracic spine strain, it’s really no fun,” says Colorado-based trainer and coach Marc Monroe . IT band syndrome, chronic hip pain , and disc issues can also stem from poor posture.
Chiropractor and physical therapist Steve Brown likes to use the snowman analogy.
“When you build a snowman, you have a couple of snowballs of different sizes, and they all need to be directly stacked on top of each other,” he says. “If your middle snowball is tilted forward, that’s going to lessen the integrity of that snowman.”
Another popular cue: pretend you have a string running through your knees, hips, spine, and head, and it’s tugging straight up. Elongate your back, tuck your chin, pull your shoulders up and back, and puff out your chest. Keep your hips stacked under your ribs and your pelvis level with the ground. Brown adds that your lower back should be neutral, neither arched nor rounded. You’ll probably need to squeeze your lower abs at least a little bit to maintain that neutrality, especially when your pack is heavy .
Remember to mind your neck , too: Instead of looking at your boots, gaze ten to 15 feet ahead of you on the trail. It takes some getting used to, Monroe says, but your cervical spine will thank you.
If the above doesn’t seem to apply to you, try troubleshooting your pack fit , which Monroe calls the number-one contributor to bad posture.
When your hip belt is securely fastened, it should be taking 70 to 80 percent of the weight of the pack. If it isn’t, the pack slides down, your upper back rounds out, your chin pokes forward, and your shoulders end up picking up the slack.
“That’s already the bad posture our mothers worried about, but add 30 to 40 pounds, and that exacerbates everything,” says Monroe.
Next, make sure you’ve packed appropriately, Brown suggests.
“If your weight is all at the bottom, it’s going to pull you backward,” he says. “If you’ve stacked all your weight at the top, it could make you unstable and push you forward.”
If your pack fits and you’re still struggling with pain, your next stop is core stability . Monroe’s not just talking about your abs, either.
“Your core refers to all the muscles around the trunk: the muscles that not only help your spine stay stable, but keep your shoulders and legs aligned as well,” he says. That includes your upper body muscles, like your traps, rhomboids, and rotator cuffs, as well as your glutes.
In hikers, those smaller muscles are often underdeveloped, which means you can remind them to straighten up on the trail all you want, but they likely won’t have the endurance to follow orders unless you spend some time prepping them in the gym first.
Monroe’s suggestion: hit the weight room at least twice a week for six to eight weeks before your next trip. Start with these exercises to build up the core , then add in heavyweight full-body exercises like squats, deadlifts, step-ups, step-downs, and walking lunges to get the system working in concert.
Do these exercises to build stability and improve your posture on the trail.
Sit in front of a lat pull-down machine or a cable machine equipped with a horizontal bar set to a moderate level of resistance. Adopt a wide grip and initiate the movement by pulling your shoulder blades down toward your back pockets. Then, draw the bar down past your chin to your upper chest or lower neck, squeezing your shoulder blades together throughout. Aim for three sets of 6 to 8 reps.
Lie chest-down on a bench with a dumbbell in either hand. (Start with 5 to 10 pounds and go up from there as needed.) Pinch your shoulder blades to draw your arms straight up, outward from your body and parallel with the floor. Aim for three sets of 8 to 10 reps.
Lie on your back on the floor. Engage your abs to press your spine to the floor, and lift both arms and both legs into the air. Then, squeeze your core to keep your spine flush with the ground and drop your opposing arm and leg toward the floor. The leverage of your limbs will make you want to arch your back; resist it. Drop each appendage until it’s an inch from the ground, then raise slowly back to your starting position. Repeat with your opposite arm and leg. Try five reps with each limb for three total sets.
Get on all fours. Extend one leg out behind you and the opposite arm in front of you, each reaching outward horizontally. Throughout, engage your lower back and traps and maintain a tight core to keep your spine perfectly straight and your hips level with the floor. Slowly lower each limb back to the starting position, then switch. Try 5 reps with each limb for three total sets.
Think of this sort of like a weightless deadlift. Start by standing upright with your back neutral and your knees straight (but not locked). Push your butt backward and hinge forward at the hips without letting your back arch or round. Some people like to hold a broom or length of PVC pipe against their spine to ensure perfect neutrality. Stop when your spine is at a 45-degree angle to the floor. Hold for 5 seconds, then straighten up. Try three sets of 10 reps.
Lie on your side, propped up on one elbow with your hips off the ground. (You can do these either on your knees or your feet). Either hold this position for 30 seconds, or drop your hips toward the floor for 10 to 15 reps. Move as slowly as you can, and keep your core and obliques engaged throughout. Do three sets on each side.
Walk across the gym with a weight in one hand. Brown suggests using the weight you want to carry on your back: if you’re hoping to backpack with 35 pounds, try working up to a dumbbell of that weight for your suitcase carry. Brace your core and obliques to keep yourself upright, countering the pull of the weight. Walk for a distance that feels challenging; if your grip starts to give out or your core starts to buckle, stop. Try walking that distance for three total reps on each side.
Hitch a band to a piece of equipment or a door at shoulder level. Hold the other side of the band perpendicular to your body and step outward from the attachment point until you feel some tension in the band. Now, brace your core and press your arms straight out in front of you as if you’re doing a diamond pushup with the band in your hands. As you press, you’ll feel extra leverage on your core; use your obliques to resist the twist. Press out until your arms are fully extended, then slowly bring your hands back to your chest. Try for three sets of 6 to 8 presses on either side.